
Instapage Review 2026: How Good Is This Landing Page Builder?

Welcome to our Instapage review.
Landing pages are a key part of any digital marketing strategy. They help you boost conversions and guide customers into your sales funnel.
So which landing page tool is right for you? Instapage might be exactly what you need.
In this review, we are taking a close look at what this powerful tool can do. We will cover the pros and cons, how to use it, and help you decide if this software is the right fit for your business.
What is Instapage?

Instapage is a landing page builder designed to help you create pages that are focused on conversions and aligned with your goals.
Turning visitors into customers takes more than just a pretty page. A landing page can look great and still fail to convert.
Instapage understands this, which is why it offers a variety of features to help you get the most out of every landing page you build.
And there are a bunch of extra ways the platform can help:
- Personalization – Create a unique landing page experience for each of your audiences using post-click content to visitor intent.
- Experimentation – Optimize the performance of your pages by analyzing the results over time and rolling out A/B testing for each.
- AdMap® – Get the visuals of your ad campaigns to map out which pages do visitors go clicking to one of your ads.
- Collaboration – Simplify the workflow of building pages between you and your team so you can get more pages built, approved, and published faster.
- Page Speed – Get more people to stay on your page post-click by making the pages load as fast as they can.
These features will make more sense once we start talking about how to create landing pages using this software.
How do you use Instapage?
Landing page builders have become more sophisticated over time. And judging from the features of this landing page software, Instapage is no different.
In fact, it could the best landing page builder for you.
Of course, you be the judge of that. Below is the step-by-step guide on how to use Instapage to create a landing page properly.
Creating a page
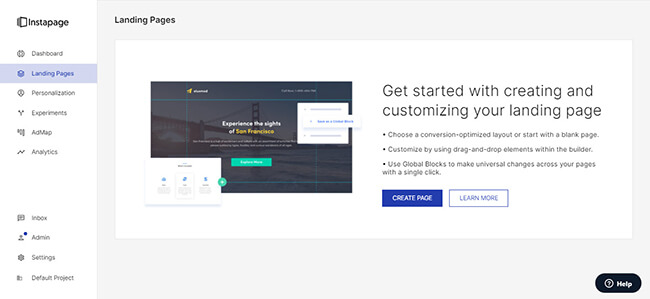
Upon logging in, the first thing you must do is create a page.
Click Landing Pages on the left sidebar and click Create Page to proceed.
On the next page, you can choose from a wide variety of landing page templates that suit your style and purpose. You can narrow down the choices by choosing the most appropriate filters on the left side.

You can always choose to design from scratch especially if you’re comfortable building pages using the platform. But for starters, it’s best to select one of the templates so you don’t have to start from scratch.
You can check out the page’s preview to get a better idea of how the page would look like if you plan on using it.

Once you’ve chosen, you need to give the page a name before going back to the Landing Pages section. Click on the newly created page to open a sliding modal from the right.

Since we haven’t customized the landing page yet to your message and liking, click on Edit Design on the top right.
Customizing a landing page
On the page editor, just click on the elements that you want to edit, just like you would using a typical WYSIWYG editor.

Adding and rearranging elements on the page is easy. For instance, if you click on the video icon on the left, a video will appear on the page.
From here, you can drag and drop it to any part of the page and resize it as you see fit. You can do the same on other existing elements.
Its drag and drop interface is impressive because you have the freedom to place the elements wherever you want on the page.
Also, a landing page template contains sets of elements also known as blocks.

You can save and reuse on other landing pages. You can also duplicate them on the page or delete them, whichever you wish to do.

And if you want to insert pre-made blocks on the page, you can do so by clicking on Insert Blocks on the page where you want to make them appear. You can also click on the Instablocks icon on the left.
Similar to landing page templates, choose which among the blocks you want to insert on the page and edit it. You can also filter the blocks based on the type you want to insert.

After editing the page, you can make other customizations using the Settings section on the right.

Here, you can edit the HTML/CSS of the page, add a JS, and track its history.
The latter is important if you want to revert to your previous design if the current one doesn’t work for you.
Once you’re done with designing the landing page, check the desktop and mobile version to see how the page appears on both devices.
The current default view is on desktop. To see how the page looks like on mobile, click on the Mobile button on the top left.

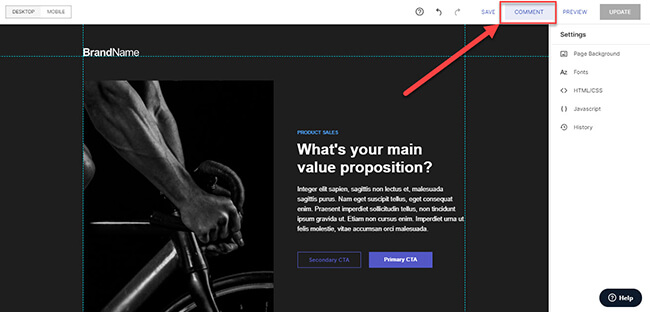
Leave comments about the landing page
If you’re a designer who wants to get approval from your client for the page or the other way around, this feature comes in handy.
From the landing page editor, click on the Comment button on the top right of the screen.
On the new window, you can click on any part of the page that you want to comment on. This will open a text bar where you can mention the client or designer and leave your thoughts about the block or element.

Using this feature, you eliminate the constant back and forth on email and messenger and just see the message straight from the landing page. This way, you or your designer can make the changes on the go.
Once you’re done commenting, click on the Share button. You have the option to share the link with your client or designer or email them directly.

Refining landing page features
From the Landing Pages section on the dashboard, click on the landing page you wish to open.
On the sliding window, click on Conversion Goals to choose how the software will track the conversions on the page. For instance, if the page requires people to fill out a form, activate Form submissions.

If you’re using a third-party tool or code to track the page performance, click on Integrations to connect Instapage with your preferred analytics software or email marketing services.

The Scripts & GDPR option allows you to include a required checkbox to prove that the page is GDPR-compliant. Also, this is the part where you can include your tracking scripts so your analytics tools can help gather additional data.

Finally, the Search & Social section is where you can tweak how you want the page to appear on Google search and social media. You can edit the page’s metadata for search engines as well as platforms like Facebook and Twitter.

Publishing your landing page
If your landing page is ready for prime-time, click on the page you want to publish from the Landing Pages section and click Publish Experience.

You can choose from four different options on how to make the page go live:
- Custom Domain – Use and connect an existing domain you have with the platform and publish it there.
- WordPress – Install the Instapage plugin on your WordPress site to publish it directly from the CMS.
- Drupal – Similar to WordPress, download and activate the plugin on your Drupal site so you can choose which page to publish on your site.
- Demo page – Enter a subdomain that will be published from Instapage so people can access the page.
Analyze landing page performance
After publishing your landing page, give it time for the tool to gather enough data from visitors. Using the collected information, you will be able to review its performance based on different variables.
To see this, click on Analytics on the left to access the data.

The first thing you’ll see here is the Workspace Overview. It breaks down all the landing pages according to three factors: visitors, conversions, and conversion rate.
The most important variable to consider here are the conversion rates. The higher the rate, the more effective the page is.
The data will depend on how many hits the page received over time. If it provided insufficient data, either you have to give it more time to generate more visitors or promote it to boost its traffic.
Scrolling down the page, you will see the Performance by Landing Page section where you can analyze one landing page at a time.

Another difference here is you’ll see the traffic and conversions for the specified day according to time. So if you’re getting thousands of traffic from the page, this feature helps you organize how many visitors you’re getting per hour.
Run experiments to increase conversions
Using the gathered data from Analytics, you are better equipped to determine which pages to optimize and work on to improve its conversion.
To do this, click on Experiments to launch your A/B or multi-variate test.
Next, you must name the experiment, enter your hypothesis to determine the goal of the test for your sake, and choose the page you want to run a test on.

Then click on Add Variant to either create or import the variant to be tested. Once the variant is credited, you can proceed to edit the page.
You’ll go back to the page editor to tweak the variant. If you chose to create a variant, it will create a duplicate of your initial landing page.
The great thing about A/B testing is it lets you create different versions of the page by isolating certain elements and putting them to the rest.
In doing so, you get to see if the change on the landing page could yield massive gains in terms of conversions.
From here, make the changes based on your hypothesis. Ideally, only make small changes so you don’t skew the testing. Having drastic changes on your variant to the top that the variants don’t look like invalidates the test.
Once you’re done creating the variant, you can create another one if the need arises. Otherwise, edit the Traffic Split among the variants.

It’s best to split them evenly to make sure both get a fair share of the traffic.
Once you’re okay with the split, click on Start Experiment to commence the A/B testing.
But before it launches the experience, the tool reminds you that any changes made during the experiment might screw up the results.

Therefore, make sure that you’re okay with the variants before going live with this.
Upon starting, you should see which among the variants got the most conversions over time. Once there’s a clear winner as to which version converted the most, stop the test and work with the winning variant.
Instapage pricing
Instapage has a very simple pricing structure.
There are only three pricing plans to choose from; Create, Optimize and Convert. All plans inlcude unlimited pages, conversions and contacts.
Specific features are as follows:
Create – $99/month for 15K unique monthly visitors ($79/month billed annually)
- Triggered popups and sticky bars
- AI content
- Drag & drop builder
- Collections Reusable page blocks & forms
Optimize – $199/month for 30K unique monthly visitors ($159/month billed annually)
- Everything from the Create plan
- A/B testing
- Scheduling
- Multi-step forms
- Customizable traffic splitting
- And more…
Convert – custom pricing
- Blobal blocks and forms
- Heatmaps
- Direct lead bypass
- CSM & professional services
- And more…
Now, let’s get this out of the way:
If you’re a casual business owner, Instapage could be way out of your budget. That also means you’re not the landing page software’s target audience.
This isn’t a knock again Instapage. In fact, it’s a testament to their commitment to providing refined features that is a cut above the rest of the other tools out there.
Instapage pros and cons
Pros
- Dedicated landing page builder – Built and marketed as such, Instapage delivers on all front. You’ll be hard-pressed to find a much more robust and comprehensive landing page creator than this.
- Beautiful landing page designs for templates – Instapage takes away the guesswork from building landing pages from the ground up. It makes you look like a designer without breaking a sweat! Also, the number of templates to choose from allows you to find the right one for your business.
- Easy to use page editor – Bring your design ideas to life without the limitations that exist in other software. If you want to make the element or block appear on a specific part of the page, the tool will let you do it!
- Useful collaboration tools – For those working with a team or directly with a client, the ability to leave comments on the landing page design allows you to pinpoint the changes to be made, this helping make the workflow simpler and faster.
Cons
- Lack of plan options – A more affordable plan for smaller businesses would be a nice addition.
- Solely focused on landing pages – I mention this as a con because it limits the platform but it’s a pro as well. It just depends on your needs as to whether it’s a positive or a negative.
Verdict
Let’s wrap this Instapage review up.
Here’s the truth. Instapage is one of the best landing page platforms on the market, no question about it.
Its goal is simple: help you convert more visitors into customers. And it does exactly that by giving you every tool you need to create pages that actually move the needle.
Use it right, especially alongside your ad campaigns, and you will see results that put real revenue into your business.
What I respect most about Instapage is that it stuck to its lane. It focused purely on landing pages and made them better than anyone else. The drag and drop builder, A/B testing, and dynamic content tools make it easy to build pages that work.
Because it stayed focused, Instapage perfected its features and offers some of the best landing page tools you can find.
That said, it is not for everyone. The price might be too high for solopreneurs or very small businesses.
But if you are serious about growing your business and increasing conversions, Instapage is a tool that will get you there.
Seeing is believing so click here to try Instapage for yourself. Completely free.